For the past two weeks I’ve been getting tons of comments on what’s clearly my most popular video on YouTube. This should ideally be good news for me however that’s not the case as some of the comments are not meaningful in any way or are merely spam.
As a result of this my email inbox is receiving a lot of comment notifications that are impossible for me to keep up with. However this is not enough of a reason to prompt me to unsubscribe from all emails for my YouTube Activity as I would still wish to get notifications for my other videos.
Consequently, I’ve contemplated with the idea of disabling comments in that video for good however I decided not to as that would mean denying people an essential feature of YouTube.
After days of contemplating what to do, yesterday while checking my Gmail settings I figured out a workaround: I could simply set a filter for these particular emails.
So I did just that and now my problem is solved: all the email notifications for this particular video are being skipped from the inbox and instead get archived as they arrive.
One can also use other filters like deleting the emails as they arrive, labelling them or putting them to a given category.
Create Gmail Filter to Stop YouTube Emails
1. Log in to your Gmail Account on desktop. If you’re on the mobile site, switch to the desktop view. It’s the only way to access the entire settings.
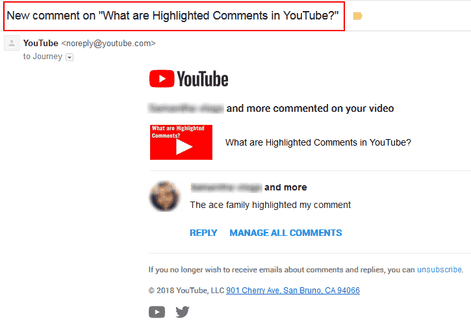
2. In your inbox open the YouTube comment email notification for the target video and copy its Subject. It’s should be something like: New Comment on “Title of the Video”
3. Next click on the gear icon and select Settings from the menu.
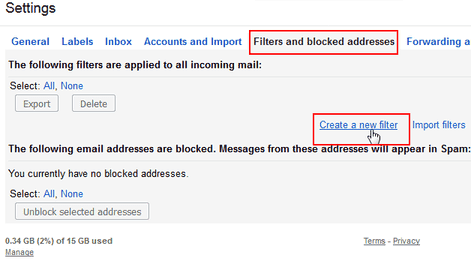
4. Inside the Settings window, select the Filters and blocked addresses tab then select the option to Create a new filter.
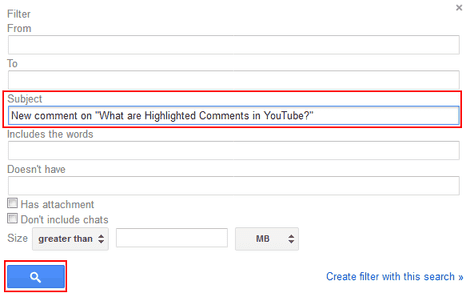
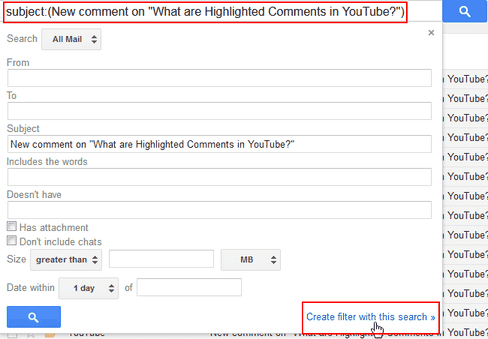
5. In the filter window, paste the subject we copied in the Subject text box then click on the Search button to preview which emails will be filtered with that rule.
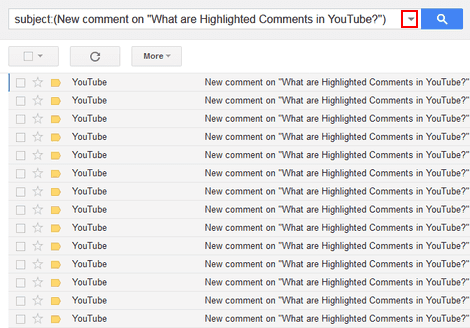
6. You should be able to see all the emails that contain that Subject i.e. all the comments notifications for that video.
7. In the search box next to the filter, click on the small down facing arrow to bring the filter window into view again. At the bottom of its window, select the option to Create filter with this search.
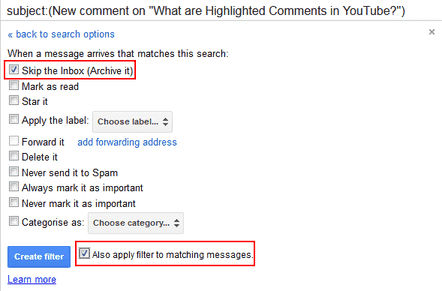
8. Now decide how you’d want it to handle the emails that get filtered. You’ve the following choices:
- Skip the Inbox (Archive it) – emails won’t show up in the inbox, instead they will be archived as they arrive. The archived emails can be viewed from the All Mail option (not the Archive label)
- Mark as Read – will mark it as read but will still show up in your inbox.
- Star it
- Apply the Label – marks the emails with an existing label or one that you create.
- Forward it – forwards it to another email address.
- Delete it – sends them to the Trash Bin (emails here are automatically cleared after 30 days)
- Never Send it to Spam
- Always mark it as important
- Never mark it as important
- Categorise as – puts the emails into a given category.
Since we don’t want them anywhere close to the inbox, Skip the Inbox and Delete it option are the most suitable.
9. If you want the existing emails to be applied that filter, put a check mark on Also apply filter to matching messages.
10. Click on the Create filter button to finish.
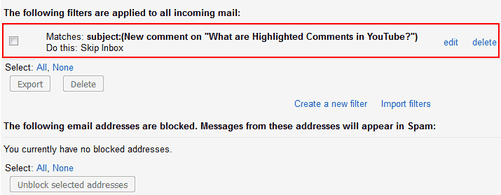
Now every email comment notification for that video should be well taken care of by that filter. If at any point you’d wish to edit or delete this filter, you can find these options in the Filters and blocked addresses settings.

thanks for this great helpful guide! exactly what I was looking for 🙂 the step-by-step instructions were easy to follow, I’m hoping this will cut down on my InBox clutter
Glad to hear you found it helfpful!