When you upload images on WordPress, it generates additional images sizes defined in the Media settings. The default sizes are the thumbnail (150×150), medium (300×300) and large (1024×1024) though additional sizes may be defined by the theme you’re using.
Other than the thumbnail size, the other sizes usually go unused thereby taking unnecessary storage space. Additionally, there is no way of deleting the extra sizes automatically which may be necessary when redesigning the site or defining new image sizes.
Recently I faced this exact situation with one of my sites. Fortunately, I found a quick way to delete the generated images while retaining the original ones I had uploaded by using a searching tool that supports RegEx.
This way I could refactor the site and allow WordPress to only generate the sizes that were needed. Here’s what I did.
Step 1: Delete Generated Images Sizes
- Login into your server storage either through the File Manager provided by your panel or via an FTP client.
- Navigate to the uploads folder of your WordPress installation. Typically, you’ll find it in
public_html/wp-content/uploads/if you’ve installed WordPress in the root directory of your hosting. - Download the entire uploads folder onto your computer. If you’re using cPanel or DirectAdmin, the folder will be zipped then downloaded.
- Extract the contents and make a backup just in case you delete the wrong images.
- Now the most important part: download and install Agent Ransack or an equivalent searching tool that supports Regular Expressions.
- Launch the program and in the Look in box select the extracted uploads folder and enable the Subfolder option.
- In the file name box enter the following expression:
.*-[[:digit:]]{1,9}x[[:digit:]]{1,9}(@2x)?.(jpg|jpeg|png|eps|gif|webp)
This regular expression will find all the generated image sizes in the formats JPEG, PNG, GIF, EPS and WEBP. It does this by matching the image width and height suffix that is added to the file names of the generated images i.e. image-{width}x{height} e.g. image-150×150.png, image-300×200.jpg, image-768×512.jpg, image-1024×683.jpg. - Click the Start button to start the search.
- Preview the results and make sure it has matched only the generated sizes. Note: The expression will not match uploaded images whose filenames already had the width and height suffix. This is because WordPress resolves the conflict by renaming the file by adding a number to the end of the original filename i.e. image-150×150.jpg becomes image-150×150-1.jpg hence the generated size becomes image-150×150-1-150×150.jpg. The latter is what the expression will match.
- Select all the found images and press Delete to remove them from the uploads folder. You can also cut and paste them in a new folder.
- Compress the uploads folder into a ZIP file and upload it back into the wp-content folder.
- Delete the original uploads folder then extract the new one in its place.
Your WordPress site now only has the original image sizes, however it’s missing thumbnails and other image sizes you may need.
Step 2: Regenerate Needed Sizes
WordPress will not regenerate the images sizes automatically after deleting them. You’ll therefore notice the thumbnail previews are missing in the Media Library and the featured image section in the post editor.
To restore them do the following;
- First, we need to unregister unwanted image size. For the default sizes, just set the weight and height values in
Settings > Mediato zero. - For other sizes, install and activate the Disable Media Sizes plugin then go to
Settings > Disable Media Sizesand disable the other size that are defined by WordPress (usually for srcset). Alternatively, you can use code snippets from the developer to do this if you don’t want to install the plugin. However, note that if you deactivate or delete the plugin, the sizes will be re-enabled.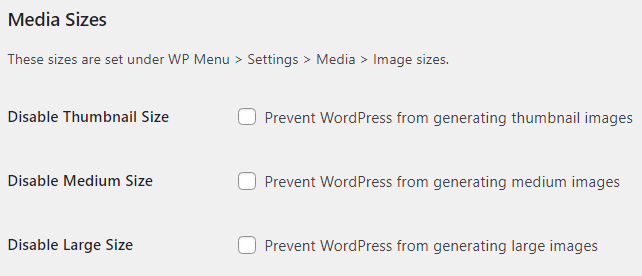
- Next, install and activate the Regenerate Thumbnails plugin then go to
Tools > Regenerate Thumbnailsand click the Regenerate Thumbnails for all attachments button. Leave the plugin to do its work.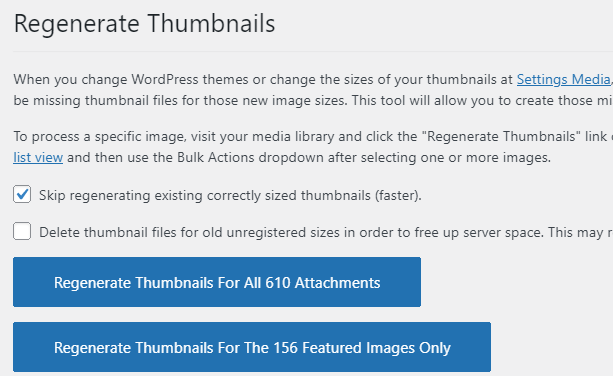
Note that the disabled sizes will not be generated even though they’re still listed in the plugin page.
So that’s it. Hope this saves you some time as it did for me.
