The block editor includes a setting to insert images inside WordPress lists using the inline image option. This option however aligns the image to the left by default.
No controls are provided to align the image to the center as it’s the case with the normal image block. Some people can live with this default behavior, however, there are those of us who cannot live without centered images.
The quickest solution I have come up with is to just use some CSS to override the default style as follows:
li img {
display: block;
margin-left: auto;
margin-right: auto;
}
Using the CSS
To use this CSS, just add it to your Additional CSS rules inside the Customizer. Note however that the above rule will apply to all images in lists across your entire site – page and posts alike.
To apply the rule to posts only, you can customize the CSS by adding to the rule the single posts’ selector according to your theme.
For instance, for my current theme the selector for single posts is .single-post-container, and so in my case I would customize it to:
.single-post-container li img {
display: block;
margin-left: auto;
margin-right: auto;
}
You may also want the rule to apply to just a single post or page. This too is possible as we only need to add to that specific list a CSS class with which we can select it.
To do that, select the list block inside the editor and click the Advanced option in the sidebar. In the Additional CSS class(es) box, enter a class to select that list e.g. centered-images.
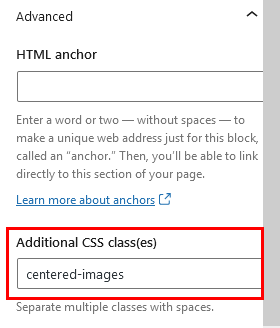
After doing that, save the post and add the following rule into Additional CSS in the customizer:
.centered-images li img {
display: block;
margin-left: auto;
margin-right: auto;
}
Now any time you want to center images for a specific a list, you only have to add the custom class to it and the CSS will do the rest for you.
