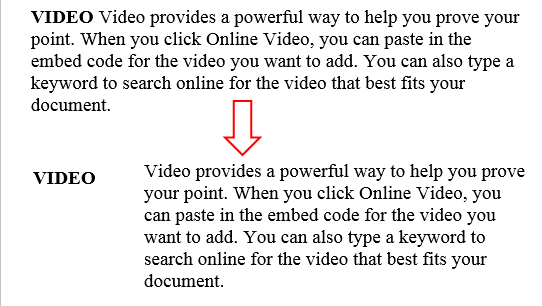
Have you ever wondered whether it’s possible to type in the margin of a Word document? Something like this:
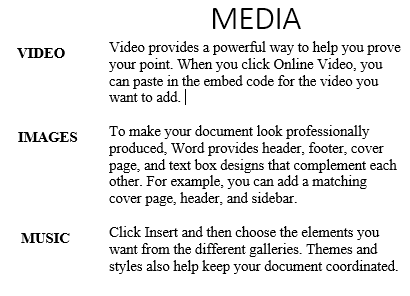
I was the other day because I recalled seeing it in some papers and books but never on the Word documents people typically type. So it turns out it’s actually possible and is relatively easy to accomplish using either one of two methods.
The methods discussed below will work on all versions of Word from 2003 and later. If you’ve trouble following the instructions, watch the embedded video from my channel to see the steps.
Method 1: Type Text in the Margin using Negative Indentation
This method uses the indent option to move the target text past the margin. The indent buttons on the ribbon however don’t accomplish this, and so we need to use the paragraph settings dialog for this.
1. Select the text you need in the margin.
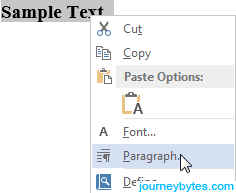
2. Right-click on the selected text and select Paragraph. This is the easiest way to do this plus it works in all versions of MS Word as of this writing.
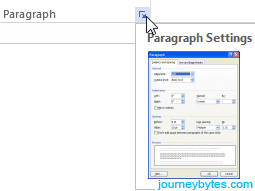
Alternatively, you can also click on the little arrow inside the paragraph options in the ribbon or simply head to the Page Layout tab for quick access to the indentation settings (MS Word 2007 and later only).
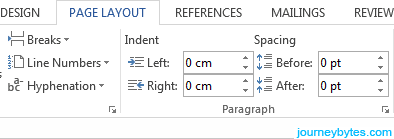
3. In the dialog under Indentation, enter a negative value inside the left box e.g. -1.75 cm, -2 cm or -2.5cm etc. then click the Ok button.
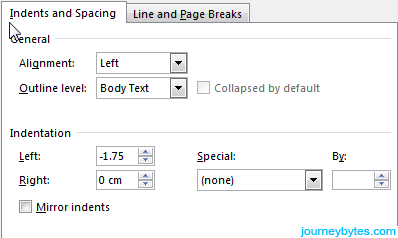
If you need the text inside the right margin instead of the left, first align the text to the right then enter a negative value in the right box e.g. -1.75 cm, -2 cm or -2.5cm etc.
Note: Don’t enter a very high value (above -3 cm) as this will move the text outside the page boundary.
Method 2: Type Text in the Margin using a Text Box
The first method works quite quick but I realized later on that it may not be practical in most situations. Reason being, the indentation setting applies to the whole line and as such you can’t add text on the same line without it being constrained to this setting.
Clearly, most of us don’t want this and this is where the text box comes in.
The text box method works a bit differently on Word 2003 and Word 2007 and later versions. I’ll cover both cases individually.
i. Using the Text Box in Word 2007 and later
1. Go to the Insert tab, click the Text Box button then choose Simple Text Box.
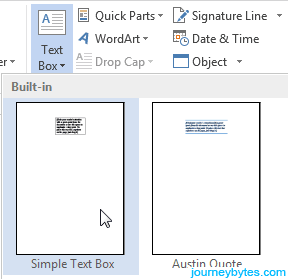
2. Enter and format the text you need in the margin inside the text box.
3. Drag the text box inside the margin that you want.
4. To remove the text box boundary, select the text box then switch to the Format tab in the ribbon. Now just look for Shape outline, click the small arrow beside it and select No Outline. That’s it!
ii. Using the Text Box in Word 2003
1. In the menu bar under Insert select Text Box.
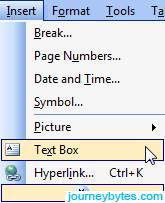
2. Doing that will only insert a blank canvas. To draw a text box, click and hold inside the canvas, then drag your mouse. Release the button once the size meets your needs.

3. Enter and format the text you need in the margin inside the text box.
4. Drag the text box inside the margin that you want. You can now delete the canvas by clicking inside it followed by pressing the Delete button on your keyboard.
Note: If you delete the canvas without moving the text box, the text box will also be deleted.
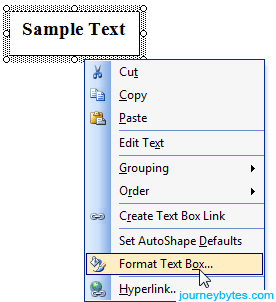
5. To remove the text box boundary, first select the text box, right-click on the boundary then select Format Text Box. You can also just double-click on the boundary.
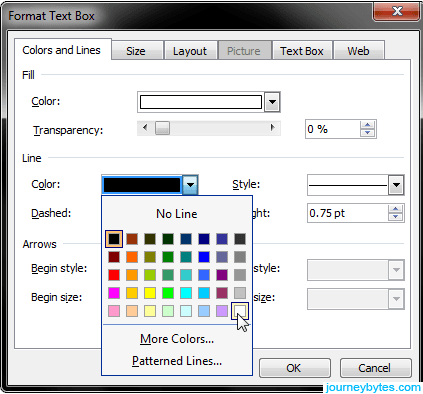
6. In the Format Text Box dialog, go to the line settings and change the colour to white. Press the Ok button and you’re done!
Still having problems? Just drop me a comment below and I’ll get to you as soon as I can.

Good to know your writing.
Thanks for sharing.