Using your own domain with Blogger has its benefits but has one major drawback: if you decide to change the domain name, redirecting it to the new domain address will present a challenge since Blogger doesn’t support external redirects.
Fortunately, we can still redirect the domain by setting up a URL Redirect record in the DNS Manager provided by your domain registrar. If done correctly this will redirect all pages including the home page, static pages and post pages.
This will preserve the internal and external links saving you the trouble of updating them manually. The URL redirect is also a 301-redirect meaning search engines such as Google will get the signal that the pages its linking to have moved permanently to that domain, and hence retain your current ranking. But there’s a catch: this will only work on HTTP. Why?
Redirecting HTTPS Custom Domain to HTTPS
Well, this is because the URL redirect record available in your DNS Manager will only accept your domain in HTTP since you most likely haven’t bought an SSL certificate for it from your registrar.
Blogger already provides free HTTPS through Let’s Encrypt so buying an SSL Certificate for this task is rather unnecessary.
I know this all too well after recently running into this exact situation while trying to redirect a blog of mine that’s using a domain hosted on Namecheap to a new domain I had bought with a local registrar.
Nevertheless, if your internal links are in HTTPS and Google search is set to use the HTTPS as the preferred version in Search Console as it was my case, this will prove unavoidable.
I couldn’t even get Search Console’s Change of Address tool to accept my new address since the secure version couldn’t redirect to the new domain. As a workaround I submitted the change using the HTTP version and it accepted but all my indexed links were in HTTPS so this proved unhelpful.
Redirect Domain Using Cloudflare’s Page Rules
Now here’s where Cloudflare comes in. Cloudlfare not only provides a free SSL certificate but also allows you to set up a forwading URL page rule that will allow you to redirect your secure domain to another domain.
And it gets better: you can do all this using their free account which restricts you to one domain. Here’s how to go about it.
Step 1: Add Your Domain to Cloudflare
1. Go to Cloudflare and sign up for a new account.
2. Add your site or rather the domain you’ll be redirecting e.g. journeybytes.com.
3. Cloudflare will then check your current DNS Records so that it can import them for you. Click Next to continue.
4. Select the Free Plan then click the confirm button to proceed.
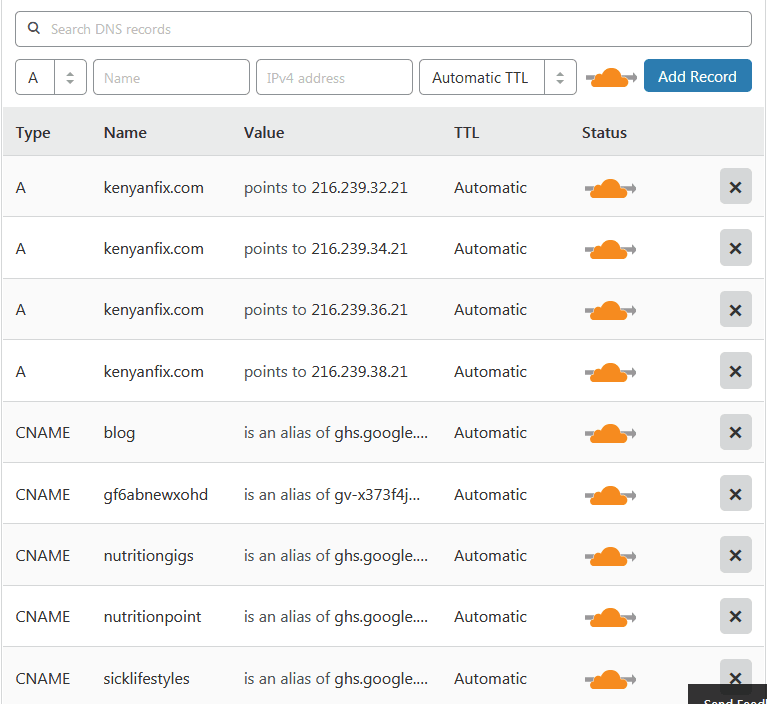
5. Next confirm that Cloudflare has imported your DNS records correctly. If any records are missing (CNAME or A Records) add them manually. In my case I had to add the CNAME records for some of my subdomains manually.
 |
| Imported DNS Records |
The records you need to make sure are added are those Blogger generated for you while setting up your custom domain. They included two CNAMEs and optionally the 4 A Records needed to redirect your naked domain to the WWW version:
- CNAME: www (or subdomain) pointing to ghs.google.com
- CNAME: unique record pointing to x.googlehosted.com
- A Record: 216.239.32.21
- A Record: 216.239.34.21
- A Record: 216.239.36.21
- A Record: 216.239.38.21
Click the Continue when you’re done.
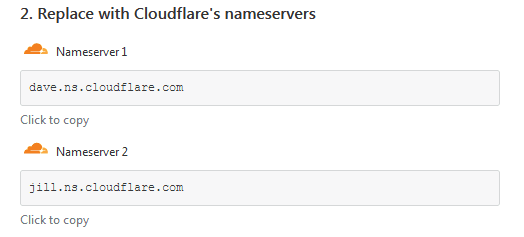
6. In the next page Cloudflare will provide you with two Nameservers. You’ll have to change the Nameservers provided by your Domain Registrar in your Dashboard.
 |
| Update to Cloudflare’s Nameservers |
If you don’t know how select the I need help changing my nameservers link to get step by step instructions for specific registrars. Click Continue when you’re done updating the nameservers.
7. You’ll now have to wait a couple of hours or up to 24 hours for the DNS change to take effect. Once the DNS is active your domain will be listed as Active when you log into your account.
 |
| Domain Active on Cloudflare |
Otherwise you can use the Recheck now button available in the Overview page to query the status manually every hour.
Step 2: Activate SSL
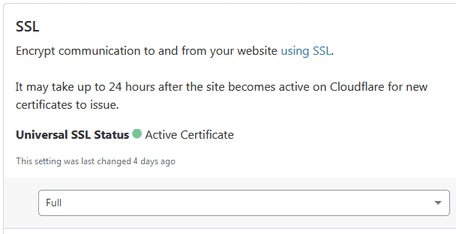
1. Go to the Crypto tab and check your SSL Status.
If you were already using HTTPS on Blogger, which I assume is the case, you’ll find the status set at Full and the status reading: Universal SSL Status – Active Certificate
 |
| SSL Status for Domain |
Leave as it is a go to the next step.
Step 3: Redirect Your Domain Using URL Forwading Page Rule
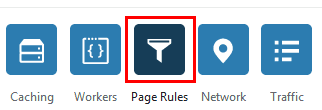
1. In your Cloudflare dashboard select the Page Rules tab and click the Create Page Rule button
 |
| Page Rules tab |
2. In the URL box enter your blog’s address e.g. www.yourdomain.com/. However since we need to redirect all pages and not just the we’ll have to use a wildcard that will catch all URLs from our blog.
To do this just add an asterisk at the end of your address so you’ve something like this:
- For a domain: www.yourdomain.com/*
- For a naked domain: yourdomain.com/*
- For a subdomain: blog.yourdomain.com/*
3. Below Click Add a Setting and select Forwarding URL.
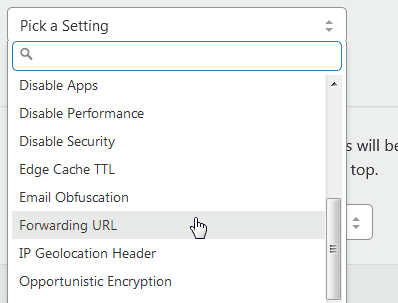 |
| Select Forwarding URL Rule |
4. In the Status code select 301 – Permanent Address and in the destination URL enter the full address to the domain you’re redirecting your blog to. e.g https://www.newdomain.com/
Since we need the new address to land to all pages and not just the homepage we’ll also have to use a wildcard here. To do that add $1 to the end of the URL so that you’ve something like this:
https://www.newdomain.com/$1
4. Click the Save and Deploy button and that’s it.
Your redirect should work immediately after doing this. The only other thing you might want to do after this is to add your new domain in Search Console then submit a Change of Address for your old domain so that Google can index and retain your current ranking.

Thankyou soo much, it really helped me. Previously, i used javascript redirect. I’ve been looking for this guide everywhere in internet, Somehow there is no guide in my native language. Sorry for my bad english.
Glad you found it helpful!
Great help Thank you…. its not a simples journey going from blogger to your own domain if your a newb…. swapping dns to cloudflair seems to resolve any connection issues…. and your forwarding advice section 3 finally nailed it…. cheers
Glad to hear you found it helpful. Cheers!
Thanks so much, it was really helpful. You saved my day!. But I’ve been wondering why we have setup the page rule cos I thought the Google 4 A’s record supposed to do the redirect – that’s the case when I’m not using CloudFlare.
Your most welcome Jamiu. The page rule is for redirecting all pages to their HTTPS equivalent. The A Records cannot redirect to another domain on their own, so we need to setup a URL Redirect.
thanks for this article. i wanted to know is it possible to have my wordpress original site on http://www.mysite.com And a blogspot site on blog.mysite.com? i am using namecheap and custom name server. so basically i have to use cpanel for that. Please Write a detailed article about this.
It is possible. You just have to create the A and CName records Blogger has provided for the blog subdomain in your authoritative DNS, which I assume is currently set to your Cpanel.
from cloudflare can i redirect subdomain to another subdomain/root domain?
example:
sub.mysite.com
and
anothersub.mysite.com
or can i do it in namecheap?
Yes, you can redirect the subdomain using Cloudflare. Just use a forwarding URL page rule.
maybe write/update post about this?
Do the following:
Should you turn on or turn off “redirect domain” in Blogger settings if you redirected the domain in Cloudflare?
Leave it off unless you want to still redirect the original blogspot domain to the old domain. That will chain the redirection as follows: blogspot domain –> old domain –> new domain.