Recently, I moved this blog from blogger to WordPress. Back on Blogger, I had been using Disqus comments but still had some old comments in its native comment system.
While these old comments were easy to move thanks to the Blogger Importer Extended plugin, the Disqus ones proved to be quite problematic.
Disqus is partly to blame for this, as their migration process is unnecessarily complicated and prone to failure. This is a stark contrast to how easy they make importing WordPress or Blogger comments into their platform.
Disqus provides some tools to help with the migration depending on your current setup. If you are moving from a different content management system (e.g. Blogger), you’ll have to make sure that the URLs of your posts and pages on WordPress are identical to those on your old site.
If you’ve only changed the domain name then you may only need to run the Disqus Domain Migration tool to migrate the comments.
On the other hand, if you have changed permalink (URL) structure, you’ll have to use the URL mapper and/or the Redirect Crawler to migrate the comments.
Step 1: Install Disqus Comment System (Automatic Installation)
We need to replace the native WordPress comments with Disqus temporarily to allow it to sync comments into the WordPress database.
The following is the automatic installation, which will only work if your site is already live. Should it fail or if your site is not live yet, try the manual installation outlined in Step 2.
On the other hand if you Disqus already setup, skip to Step 3 to get started on importing the comments.
- Go to Plugins > Add New then search and install the Disqus Comment System.
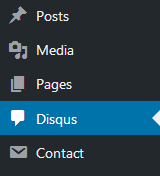
- Activate the plugin, then open the Disqus menu which will have replaced the Comments option.
- Connect the plugin with your Disqus account by following the prompts in the Install tab. Start by copying the installation token provided in step 3 then click the WordPress installation page button.

- Clicking that button will take you to Disqus where you’ll be prompted to select your site first.
- After selecting your site you’ll be taken to a page where you’ll now have to enter the Installation Token we copied if it’s not already inputted for you. Click the Install button to complete the setup.
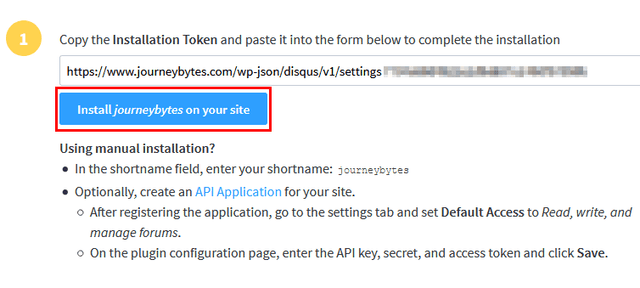
- Disqus will contact your site and finish the installation. If you encounter an error, retry by clicking the install button again.
- Go back to the plugin page, and you should find the Installation is now complete. Now proceed to Step 3 below.
Step 2: Install Disqus Comment System (Manual Installation)
If you site is not currently live (e.g. you’re developing a site by modifying your hosts file or on a temporary URL) you can opt to do a manual installation. To do that:
- Take note of the shortname provided in the Disqus setup page.
- Create an API application by clicking the link provided just below it.
- Register a new application in the API page by entering your site details.
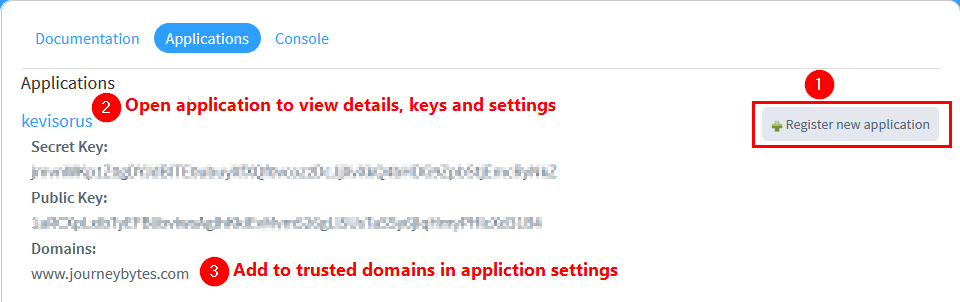
- Access the application details and copy the Secret key, Public key and Access Token.
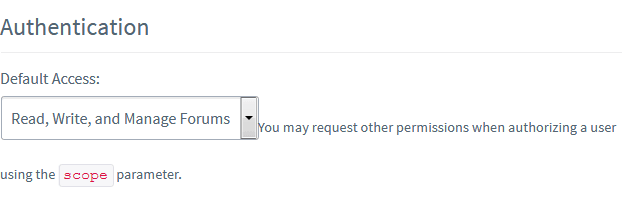
- Go to the application settings and add your site in the Domain section then under Authentication set Default Access to Read, Write and Manage Forums.
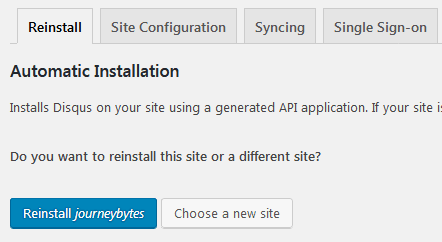
- Go back to the Disqus plugin, switch to the Site Configuration tab and enter the Shortname, Secret and Public keys. After doing this you may proceed to sync the comments as explained in step 3 below.
Step 3: Sync Disqus Comments Back into WordPress
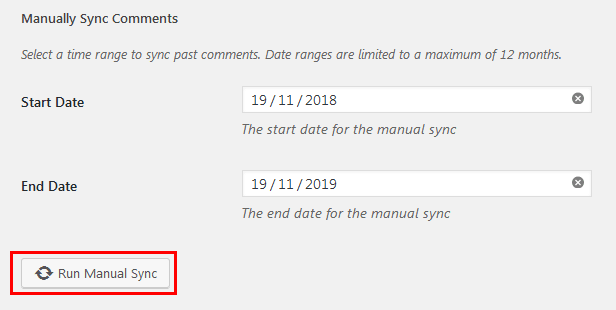
- Switch to the Syncing tab and just below the Update Auto Syncing button click the Manually Sync comments.
- Enter the dates of the comments you wish to import into WordPress and click the Run Manual Sync button. The maximum period you can sync at any one time is 1 year. If you have comments spanning several years, you’ll have to run separate syncs for them.
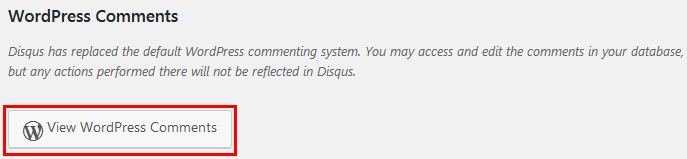
- The sync will import the comments for the entered period. You can check the imported comments by clicking the View WordPress Comments button at the top of the Syncing page.
- If not all the comments are imported, you can try running the manual sync again. After it’s done importing, deactivate the Disqus plugin to switch back to the native WordPress comments.
Known Issues with Disqus Sync Comments
1. Comments without Posts
After the importing you may notice that some comments have no posts assigned to them. If this happens to you make sure your post URLs match with those in Disqus.
This happened to a few of my posts as I had changed the URL structure but Disqus had not completed crawling the new URLs after using their URL mapper and Redirect Crawler. So give it some few days, then try running the sync again. Make sure to trash the old comments before running the sync again.
This may also happen if your site is not yet live. Prior to making this blog live, I was developing it using a host file modification. Soon after it went live most of the comments synced with posts though there were still exceptions.
On the other hand, if your URLs did not change, your only recourse may be to use Tako Movable Comments plugin to assign them posts. This plugin however hasn’t been updated for almost 3 years now and as a result doesn’t work with new WordPress versions.
Downgrading to an older WordPress version to use the plugin or perhaps editing the database manually seem to be the only viable options left.
2. Wrong Publications Dates
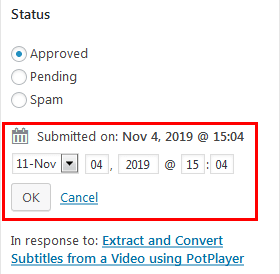
In some situations, as it was my case, some comments will have their dates of publication set to the day you did the sync instead of their original dates.
To change the dates, you’ll have to edit each comment manually and update the date of submission.
This may however be too tedious an undertaking should you have a lot of comments to update.
If you don’t need to display the comments date I suppose you can hide them with some CSS code or remove them as explained here though this would be inadvisable.
