By default, an image added to a post through the Image Block is not linked to anything. This is also the case for images added through the classic editor using the Add Media option.
When the image is loaded in the frontend, users are only able to view the image size used. Clicking the image in this state does nothing, and users have to right-click / long-press on the image in order to view it in full-screen or to download it.
It’s however very easy to link the image to the full image if needed. This is especially useful when you link to smaller images size to speed up or optimize page loading but still want to provide users with an option to preview the full image.
Here’s how to go about it.
Add Images that Link to the Full Size Image
i. Using the Block Editor
- Add an image using the Image Block.
- Select the image and click the link icon from the block menu.
- Select the Media File option to link to the uploaded image.
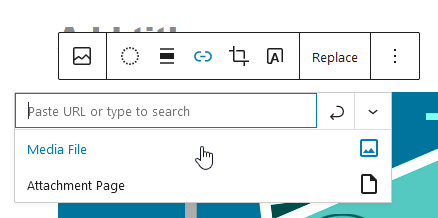
- Alternatively, you can add a link to any of the other media sizes that WordPress has generated.
ii. Using the Classic Editor
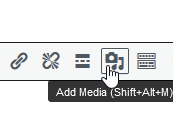
- Add a Classic block to the post editor.
- Click the Add Media icon and select the image to insert into the post.
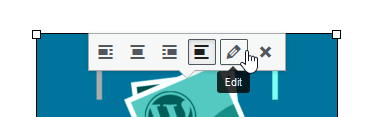
- Select the image and click the Edit (pencil) icon to open the Image Details pop-up window.
- Go to the Display Settings section and in the Link To drop-down select the Image URL option then click the Update button.
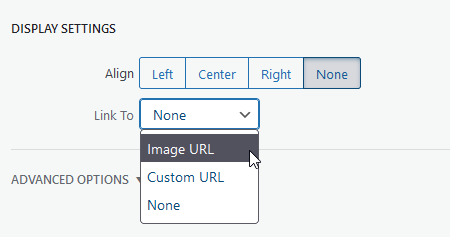
- If you want to link to a different image size to the uploaded one, just select Custom URL and add its URL.
