We’ve been all been there; you’re typing a document in Word then the worst happens: it could be a power outage, a nasty malware or the programs stops responding.
Fortunately, Microsoft Word includes a number of ways to recover lost documents. The most common one is AutoRecover which is turned on by default.
AutoRecover periodically saves a temporary copy of the document you’re working on so that in case the worst happens, Word will give you a chance to recover this copy in the Document Recovery task pane.
The default interval is usually 10 minutes though you can adjust it as long as it falls within the 1-120 minutes range.
If you’re not sure whether AutoRecover is turned on or you need to change the time interval go to Word Options then Save Tab.
AutoRecover vs Automatic Backups
AutoRecover is truly a lifesaver but it’s not always a sure option in every situation. Take for instance when you save changes you didn’t intend to save; AutoRecover will still make a backup of this copy in which case it won’t be possible to go back to your original document should something happen.
Automatic Backups work in a different way. Backups are only created when the original document is saved. So if you make any changes they will not be saved in the backup copy until you actually save those changes. As Microsoft puts it:
“The backup copy provides you with a previously saved copy, so you have the current saved information in the original document and the information saved prior to that in the backup copy. Each time you save the document, a new backup copy replaces the existing backup copy.”
Backup copies protect your document in scenarios where you accidentally save changes you didn’t intend to keep or if you delete/lose the original file. If you typically work on different drafts of the same document this is may be quite invaluable.
Automatically Create Back Up Word Copies
A. Word 2007, 2010, 2013 & 2016
1. Open Word Options.
2. In the Options select the Advanced tab on your left.
3. In the Advanced options, scroll down and find the Save section.
4. Now just add check mark in the text that reads: Always create backup copy
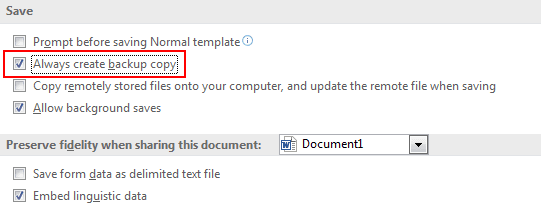 |
| Ssve Options in Word 2016 |
5. Press the Ok button and you’re done.
B. Word 2003
1. Open Word Options by going to Tools then Options
2. In the Options select the Save tab
3. In the Save options, add check mark in the first option that reads: Always create backup copy
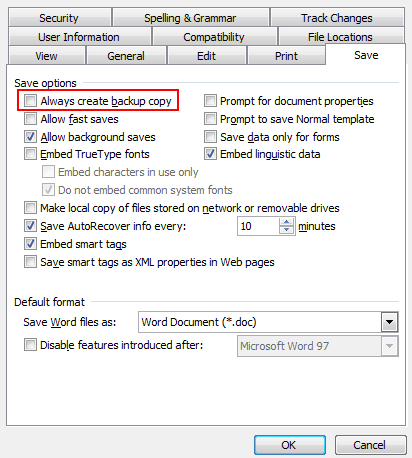 |
| Ssve Options in Word 2003 |
4. Press the Ok button and you’re done.
Location of Automatic Backup Copies
Now every time you save a document, Word will automatically make a backup copy in the same folder as your original document. The backup document however uses the extension (*.wbk) and the words “Backup of” are added to the beginning of the file name.
It also uses a different icon so it shouldn’t be hard to identify it. To open the backup is no different from a typical word document (.doc, *.docx). Just double click it to open then save it in the original format using Save as.
If you’ve problems following any of the steps, please refer to the video I’ve embedded at the start of the steps. A subscribe to this blog’s channel would be highly appreciated.
