Nowadays, taking a screenshot of your mobile screen is a relatively common thing. Maybe you’ve stumbled on a good tweet or meme that you thought should go to your digital memoirs or maybe you’re helping someone figure out how to use their new smartphone.
Whatever the reason, we can all agree screenshots are very useful thing in everyday mobile use. That’s why it comes as no surprise that Microsoft added a very handy way of taking screenshots on their Mobile OS – lock button + volume up.
Still, sometimes a screenshot just doesn’t cut it. Take for instance if you want to give a step by step walk-through on how to use an app or record yourself playing your favourite game. A screenshot is simply not an ideal choice in either scenario.
But what if I told you that you could capture a video of your windows phone screen? Yes, it’s very much possible and lucky for us it’s a relatively painless process.
Screen Record in Window Phone
You’ll need:
- A USB Cable that is compatible with your device
- A computer running Windows 7 or later
- Project My Screen App. Get it from Microsoft.
Steps
1. First, make sure your Windows phone is running either Windows 8.1 Phone or Windows 10 Mobile. You can get easily the update but its availability depends on the model of your handset and your locality.
2. Download and install the Project My Screen App program from Microsoft. After installing the program, you’ll get two shortcuts on your desktop.
One is for the launching the main app and the other is a shortcut to an example configuration file. More on that later.
3. Connect your phone to your computer using a compatible USB cable and wait for it to be detected. Once it’s detected, you’ll have Windows Phone visible as a portable device in My Computer/This PC.
4. Now launch the main app from the desktop shortcut.
5. Once it has launched, head over to your phone and unlock it if was locked. You’ll get a prompt at the top asking you to allow screen projection. Accept by tapping the yes button.
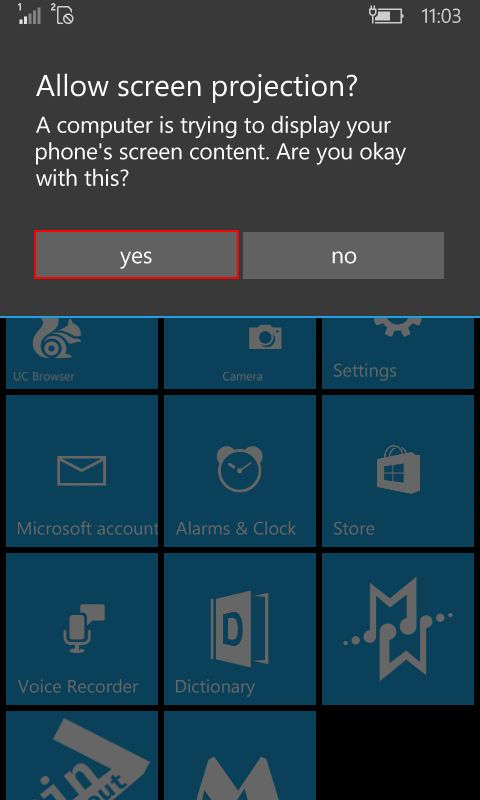 |
| Allow Screen Projection Prompt on W10M |
6. The screen should now be projected in the app’s window. To access some useful shortcuts use the F1 button. You can for instance toggle full screen mode using F or Alt+Enter, toggle the background phone image using B, change the projected orientation using the arrow keys and display the frame rate using R.
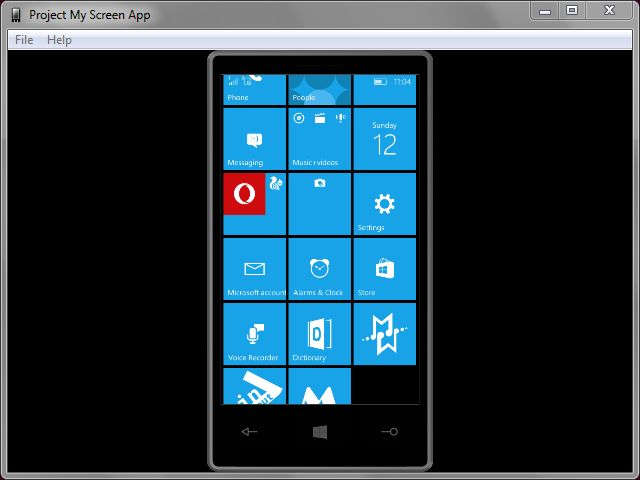 |
| W10M Screen Projection on Project My Screen App |
7. Now comes the tricky part on how to save this projection. To do that you’ll need a screen recording software to capture the app’s window or the whole screen depending on your needs. I know it’s not the most ideal way of doing this, but it’s the only way to achieve this as far I can tell.
Some good freewares you can use include CamStudio or Active Presenter (the free edition). I would recommend the latter; it’s quite robust and easy to use. It’s what I use to capture and partly edit the video tutorial I linked at the top of the steps.
Customizing Project My Screen’s Output
Now onto the configuration file. If you need to tweak the settings of the video output to your preference, you’ll need to edit a configuration file and pass it as a parameter using command line when launching the program.
The config file is simply an XML file meaning you can edit it using a text editor, though something with syntax highlighting like Notepad++ or Sublime Text is recommended.
 |
| Launching Project My Screen App with Custom Settings |
I won’t get into how to edit this file because it’s not actually easy; at least it wasn’t for me. That needs a post of its own. It’s a trial and error thing based on my experience.
However if you have the patience you can play around with it using the instructions in the example config file.
I for one managed to change the background phone image to that of a Lumia 430 and its position (you can check this video on my youtube channel to see what it looks like) but it took me a couple of days just to do that.
If you need the config file that I used for that just drop me a comment below and I’ll share it.
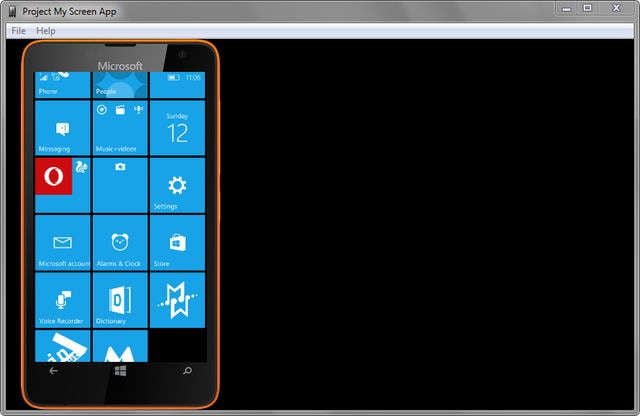 |
| Projection with Custom Phone Image and Position |
If you’ve any question or comment regarding this tutorial, just leave it in the comment section below and I’ll get to you as soon as I can.
Thanks for reading and good luck capturing your screen!
