MS Office Suite has always had splash screens. Even the archaic Office 2003 had them, though less appealing and functional compared to what we have in the later versions.
With the entry of Office 2010 the splash screens got a makeover, and they were no longer the functionless graphics that merely signified how slow or fast your computer was.
They got some fancy animations, the close and minimize buttons which I’m just realizing I’ve never used and some loading information. Regardless, I’ve yet to find any practical use for the splash screen and prefer to get right to work by skipping over it along with the new start screen introduced in Office 2013.
Unfortunately, the splash screen cannot be disabled in all Office Programs but just in the three most popular ones: Word, PowerPoint and Excel. This will however work with any version of Office from 2003 and later. Here’s how to disable them.
Disable Office Splash Screen using Switches
The splash screens are disabled by using command line switches which I realize may not be ideal for most users. The switches are:
- Word: /q
- PowerPoint: /s
- Excel: /e (this will also skip creating an empty workbook)
So that means one has to navigate in command line to where the Office programs are installed then add that switch to the executable every time you need to launch a program, e.g. for Word 2013 it would be:
C:\Program Files\Microsoft Office\Office15\WINWORD.EXE /q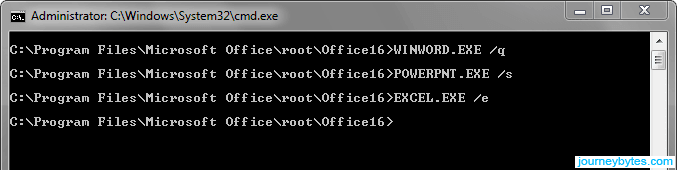
Clearly, that’s not practical for everyday use not unless you prefer using the command line to the graphical user interface. To solve this problem we can simply create shortcuts that have the switches added to the target executable.
Adding Switches to MS Office Shortcuts
1. Go to the location where your Office Suite is installed and create shortcuts for the following executables:
- Word: WINWORD.EXE
- PowerPoint: POWERPNT.EXE
- Excel: EXCEL.EXE
The location will depend on the type of Windows (32-bit or 64-bit) you’re running, as well as the version and type of MS Office (32-bit or 64-bit). The directories are as follows:
- 32-bit Office on 32-bit Windows: C:\Program Files\Microsoft Office\OfficeXX
- 32-bit Office on 64-bit Windows: C:\Program Files (x86)\Microsoft Office\OfficeXX
- 64-bit Office on 64-bit Windows: C:\Program Files\Microsoft Office\OfficeXX or C:\Program Files\Microsoft Office\root\OfficeXX
where OfficeXX is the version of Office:
- Office11: Office 2003
- Office12: Office 2007
- Office14: Office 2010
- Office15: Office 2013
- Office16: Office 2016/2019
2. Right-click the shortcut and select Properties. In the Properties window, just add the switch to the target after the quotes and click the Apply button.
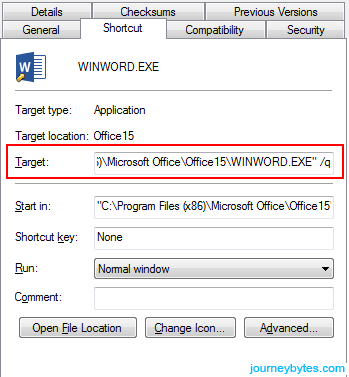
- Word:
"C:\Program Files (x86)\Microsoft Office\Office15\WINWORD.EXE" /q - PowerPoint:
"C:\Program Files (x86)\Microsoft Office\Office15\POWERPNT.EXE" /s - Excel:
"C:\Program Files (x86)\Microsoft Office\Office15\EXCEL.EXE" /e
3. To finish just copy the shortcuts to where typically you launch your programs from e.g. the Desktop.
If you use the Start Menu or a launcher that indexes the Start Menu like Launchy, just copy the shortcuts into this folder: C:\ProgramData\Microsoft\Windows\Start Menu\Programs. This folder is hidden, so you’ll have to enable display of hidden folders in order to see it.
Alternatively, you can modify the existing MS Office shortcuts that are in that folder. They can be in the root of the folder or in specific folders:
Word 2010 and below: C:\ProgramData\Microsoft\Windows\Start Menu\Programs\Microsoft Office
Word 2013 and later: C:\ProgramData\Microsoft\Windows\Start Menu\Programs\Microsoft Office 20XX
You may however find some of the shortcuts are not editable as shown below:
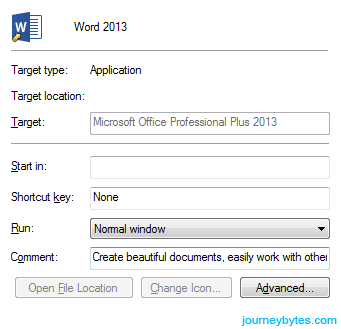
For such shortcuts, you can delete them then copy the new modified shortcuts into this folder.
