Do you have a bunch of HTML files with random names that you’d want to rename with their corresponding title tags? Here’s a quick way to do it using a bulk renaming utility called ReNamer for Windows PC.
The program is free for personal use but requires registering licence for commercial use. You can download the installer or the portable version from the developer’s site here.
I stumbled on this app while trying to rename some HTML files that had random names that I wanted to merge into one HTML file. Renaming them with their actual titles made it possible to identify them without having to open them first, thus saving me a lot of precious time.
Note: Confirm that your HTML files have Title tags before trying to rename them.
Steps
- Launch the application and accept the license terms.
- Drag and drop the HTML files you want rename into the application’s window or add manually using the Add Files / Add Folder menu buttons.
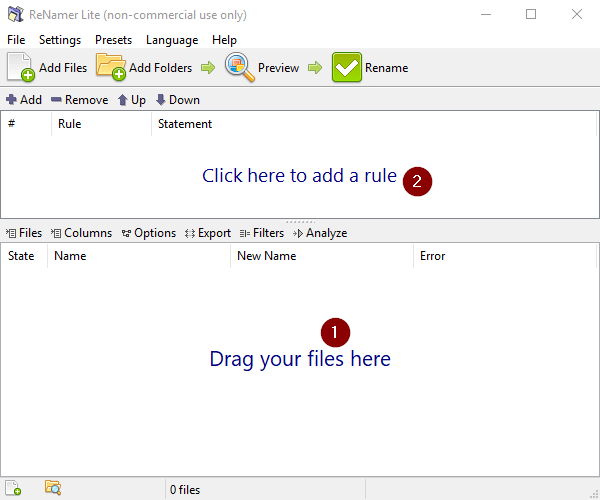
- Click the Add button or inside the rules box to add a renaming rule.
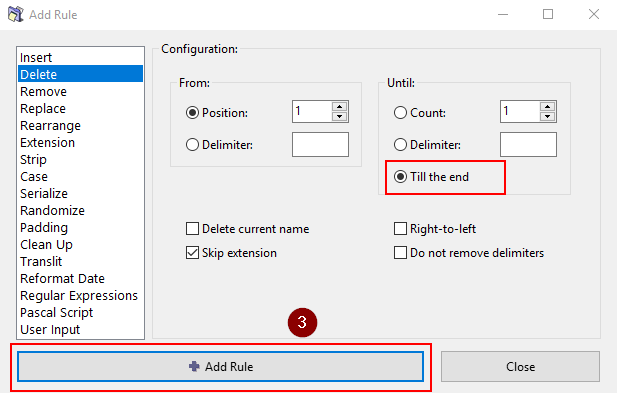
- First, we need to remove the existing name. To do that, select the Delete rule then enable the Till the End option. Leave the other options as they are, then click the Add Rule button.
- You’ll get a validation error that you have duplicates in the list since all the files have no file names. Ignore the error and instead click to add another rule.
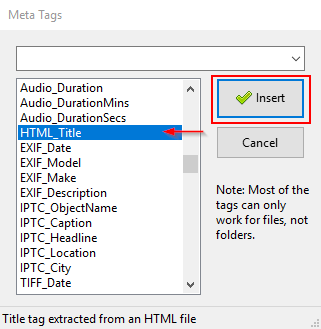
- Select the Insert rule then click on the Insert Meta Tag button.

- Select the HTML_TITLE tag from the list and click the Insert button.
- Doing that will add
:HTML_Title:into the Insert configuration box. Click the Add Rule button to go back to the main window. - The application will validate the rules once more. If you get any validation errors like Invalid characters or duplicates make sure to either correct the affected files or remove them from the list before renaming.
- Preview the new file names and if everything is fine, click the Rename button to rename all of them at once. Should you want to undo the renaming, just use Shift+Ctrl+Z or go to File > Undo Renaming. The original file names will then be restored.
Note that you can add other rules to fine tune the new names to your liking. When adding new rules pay attention to their order as the top most rules take precedence over those below it.
