Thinking of making simple video visualization for some music? Well, if you can’t afford programs that are built exactly for that purpose, then I’ve something you can try.
The output may not look as professional, which is why I explicitly used the word simple, but for something completely free the results are pretty decent not to mention very easy to make.
To do this we’ll be using a powerful video player which you might have heard of that goes by the name of Potplayer. It plays all kinds of video and audio formats and does this right out of the box without the need for installing those bloated codec packs.
It’s available for Windows and is completely free with no added costs.
Now, I know you’re wondering how exactly does a video player begin to make a video visualization? Let’s answer that question first.
The PotPlayer Visualizations
Well, the thing is that PotPlayer comes with visualizations which can be enabled when playing audio files.
The exact visualization(s) are those from Windows Media Player (WMP) which you might be aware of if you’ve used it to play music.
However, it doesn’t include all of them, just the Alchemy one which packs many visualizations that alternate randomly. The Battery and Bars and Waves visualizations are curiously missing.
The other one is Floating Ball which as the name suggests are random coloured balls bouncing all over the screen.
These two can be combined so that they’re rendered simultaneously in what Potplayer appropriately calls WMP visualization + Floating Ball.
Alternatively, the program can display embedded album arts which can then be overlaid behind the visualizations.
Pretty neat if you ask me. But how exactly does it make the video?
Making the Video
Well, thankfully we don’t need a screen recording program for that. You can use one, but that’s not the most ideal way. Why?
By recording the screen, the video quality is diminished not to mention you’ll be limited to whatever resolution you’re using on your monitor. To ensure we get the best possible quality, Potplayer has to do both the rendering and recording for you, which fortunately it does.
First we’ll tell it to render the visualizations at a particular resolution. The default is 640×480 but you can go as high as 1920×1080 (HD).
Of course, the higher the resolution the more powerful your computer needs to be, otherwise you’ll notice lags which will be noticeable in the final output.
Finally, we need for it to record (and encode) the playing as it simultaneously does all these. PotPlayer can do that too and what’s more, it offers plenty of codecs to compress the video for you on the fly.
So at the end of it, you’ll end up with a MP4 file (or whichever other format you choose e.g. MKV, WMV, AVI etc.) that you can play on any modern player or edit in a video editor.
I’ve made a couple of samples for demonstration purposes which you can watch below:
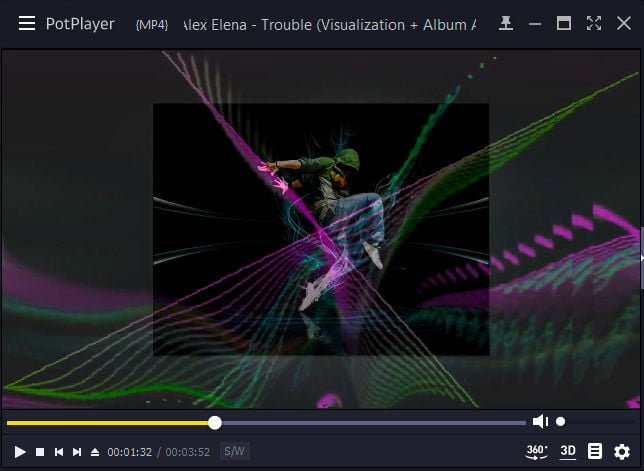
Sample #1: Topher Mohr and Alex Elena – Trouble (Visualization + Album Art)
Sample #2: Topher Mohr and Alex Elena – Trouble (Visualization Only)
If those demos have you convinced, then it’s time to see how to go about making one.
Step 1: Set up the Visualizations
- Get the latest PotPlayer from the official download page and install. It’s only available for Windows (32 & 64 bit).
- Launch the player and load your audio track (MP3, WMA, AAC, WAV, FLAC etc.) by dragging and dropping it inside PotPlayer’s window. Doing this will automatically start playing the track, so pause it first.
- By default, if the track has an embedded album art, that’s what Potplayer will display in its window. To show the visualization instead, right-click inside it’s window then go to:
Visualization > Enable Visualization for Audio Tracks. - Play your track now, and you should see the visualization in action. If the track has an embedded cover, the visualization will be overlaid on top of the cover. To disable this, right-click and go to:
Visualization > Display Album Art/Cover Pictures.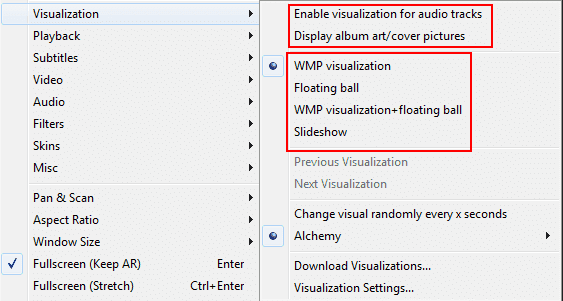
- Now decide which visualization you want to use. You can use the WMP Visualization (Alchemy), Floating Balls or WMP visualization + Floating Ball. The last one, Slideshow, is just that — a slideshow of pictures from a folder of your choice. Sadly, you can’t overlay visualizations on top of the slideshow.
- You can also click the Download Visualizations… option which will take you to the WMP Visualizations download page. These are downloadable but you’ll have to install them manually by registering their DLLs (something I’m yet to succeed to do in Windows 10).
Your best bet here is to use the WMP Visualization (Alchemy) which has a bunch of visualizations inside it. Alchemy randomizes the visualizations it has after a couple of seconds. By looking I think the interval is between 10-15 seconds.
Potplayer allows you to change this time interval but from my observations that doesn’t seem to work. But you can try for yourself by going to: right-click > Visualization > Visualization Settings...
Add a check mark where it says Change visualization then beside it, you can change the interval time for the randomization.
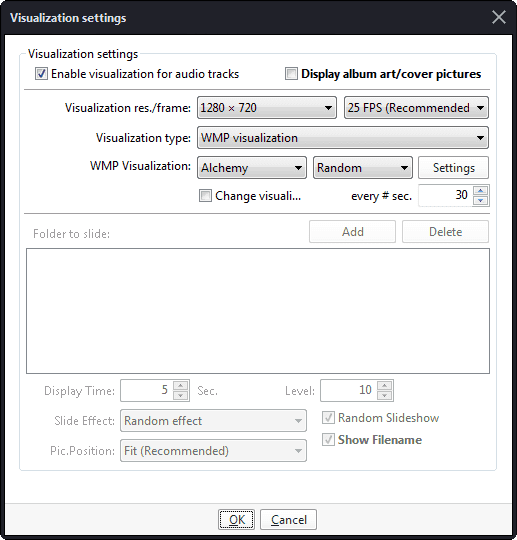
While still in the Visualization Settings, you might as well pick the resolution you want if you don’t want the default of 640×480. Just choose one form the Visualization res./frame drop down menu.
If you’ve a reasonably fast computer, I guess you can go as high as 1920×1080 (HD) otherwise I think as a compromise the 1280*720 (720p HD) or below should do for most average powered computers.
Alternatively, you can always test before deciding on which resolution to use. However, remember it will also be recording which is what actually requires more processing power. Therefore, should you choose to test, do it while the recording is running (see step 6 below).
Step 2: Record and Save the Visualization Video
With the visualizations set, it’s time to record the video. To do that: first make sure that your track is at the starting point.
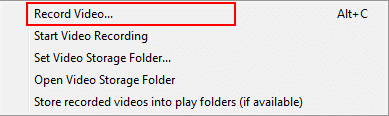
Next, go to: right-click > Video > Video Recording > Record Video or just press Alt+C.
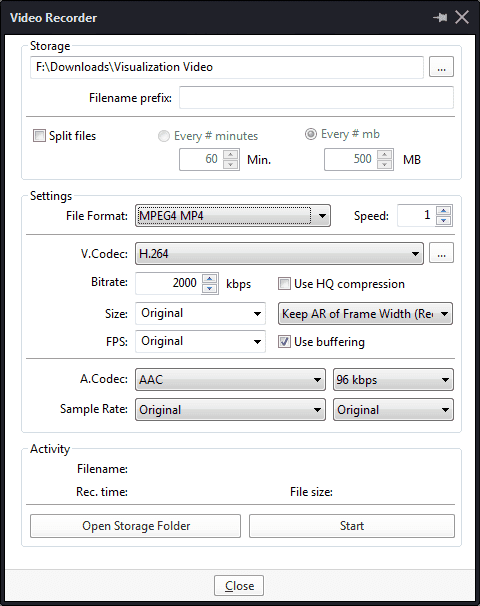
In the Video Recorder settings, first select where to save the recorded video and filename prefix if need be.
Next select the video format to use. For more flexibility, MKV is the best choice as it gives you the widest choice of codecs to use (lossy and lossless ones).
If you however prefer MP4 which seems to be the most widely used format, select MPEG4 MP4.
NOTE:
- Whichever video format you select will determine the codecs at your disposal. Codecs (audio and video) are different from video and audio formats (containers) and
actually they’re the ones that determine the compatibility and quality vis-a-vis
size of your video. - Good codecs produce high quality video/audio at smaller sizes however they often need more processing power to do this. I’ve explained much of this here should you want to learn more on this.
- For MP4 select the video codec as H.264 which is what is widely used nowadays and AAC for the audio codec. Leave the rest of the settings as they are (FPS, Size, Bitrate).
- For MKV you get plenty of choice. You can use whichever combination of video and audio codecs and MKV will accept it. However, for better compatibility and compression use H.264 + AAC or VP9/VP8 + Vorbis.
- If you choose to use lossless codecs (RAW, YUV, Direct Stream, VFW, PCM, FLAC etc) MKV should be your choice but there is little point of using them since the output size will be too large (hundreds of MB for just a couple of seconds).
- If you plan on uploading the video on YouTube, use MP4 (H.264+AAC) or WebM (VP9+Vorbis). It’s what Google recommends if you want your video to process much faster.
- Leave the resolution (size) at Original so that it uses the resolution selected in step 5. Increasing the bitrate doesn’t seem to have much effect on the quality so just leave it a 2000Kbps.
After selecting the codecs, click on the Start button to start recording then switch to the player and play the track. Let it record for as long as you wish then click the Stop button when you’re done.
Check the location you selected to record the video and you should find the video file there. You can fine tune your video by playing around with the settings or alternatively editing it in a video editor.
So that’s my quick cheap way of making a music video visualization. Have fun!
